Explore the Archive

Narrow by decade, suburb, or image type — or combine them and see what surfaces.

142 works of 1102
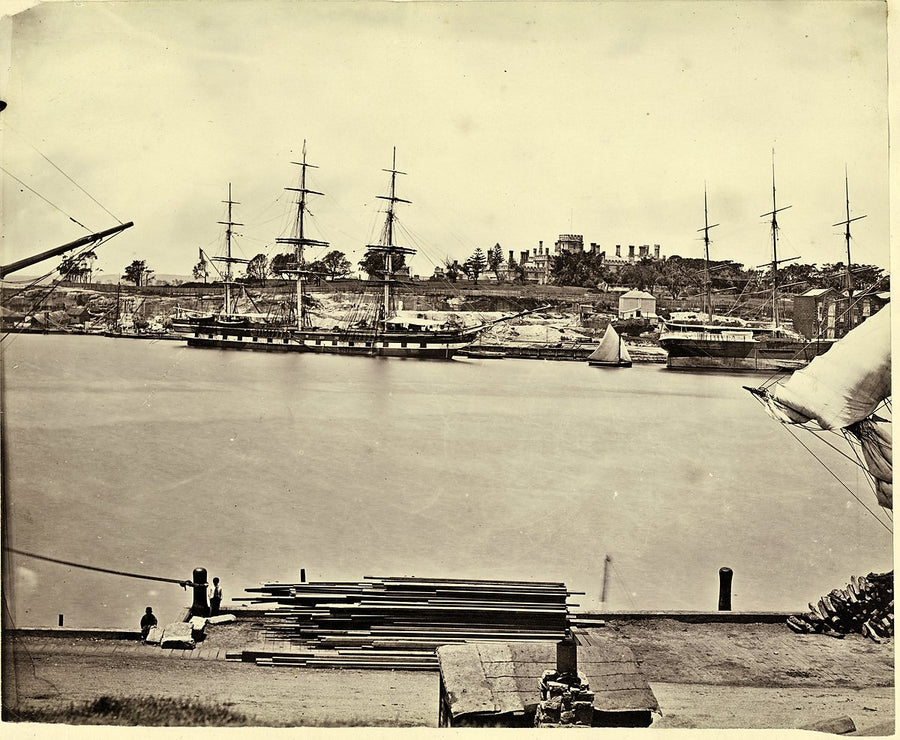
Sailing ships berthed at East Circular Quay with Government House beyond — photograph, from Sydney CBD, 1870
photograph·1870·Sydney CBD

Sailing ships berthed at East Circular Quay with Government House beyond, 1870

Government House from George Street, ship "La Hogue", Sydney, Dec. 1870New South Wales. Government Printing Office
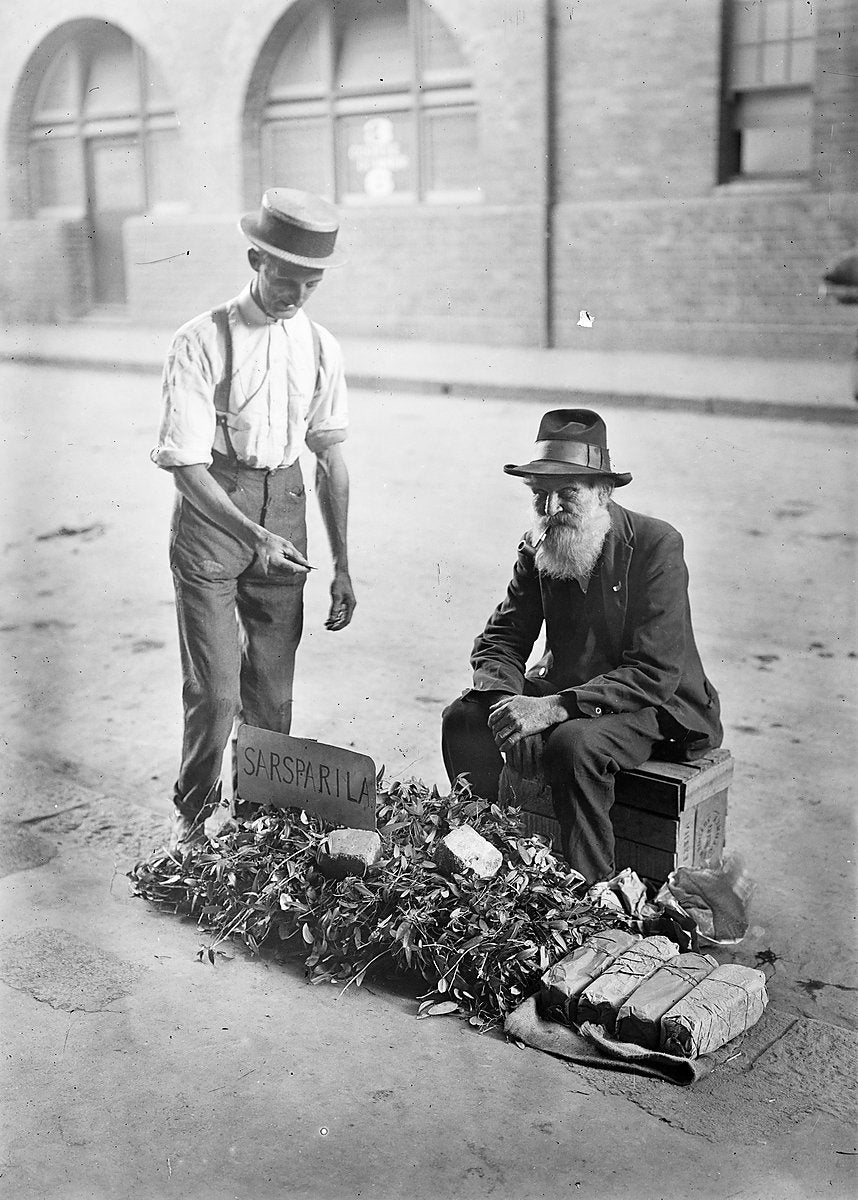
Sarsaparilla seller at the City Markets, Haymarket — photograph, from Haymarket, c. 1911–16
photograph·1913·Haymarket

Sarsaparilla seller at the City Markets, Haymarket, c. 1911–16

Sydney marketsRex Hazlewood
Schoolboy rugby players passing the ball, Sydney Grammar — photograph, from Sydney Grammar School, 1954
photograph·1954·Darlinghurst

Schoolboy rugby players passing the ball, Sydney Grammar, 1954

Sydney Grammar, June 1954
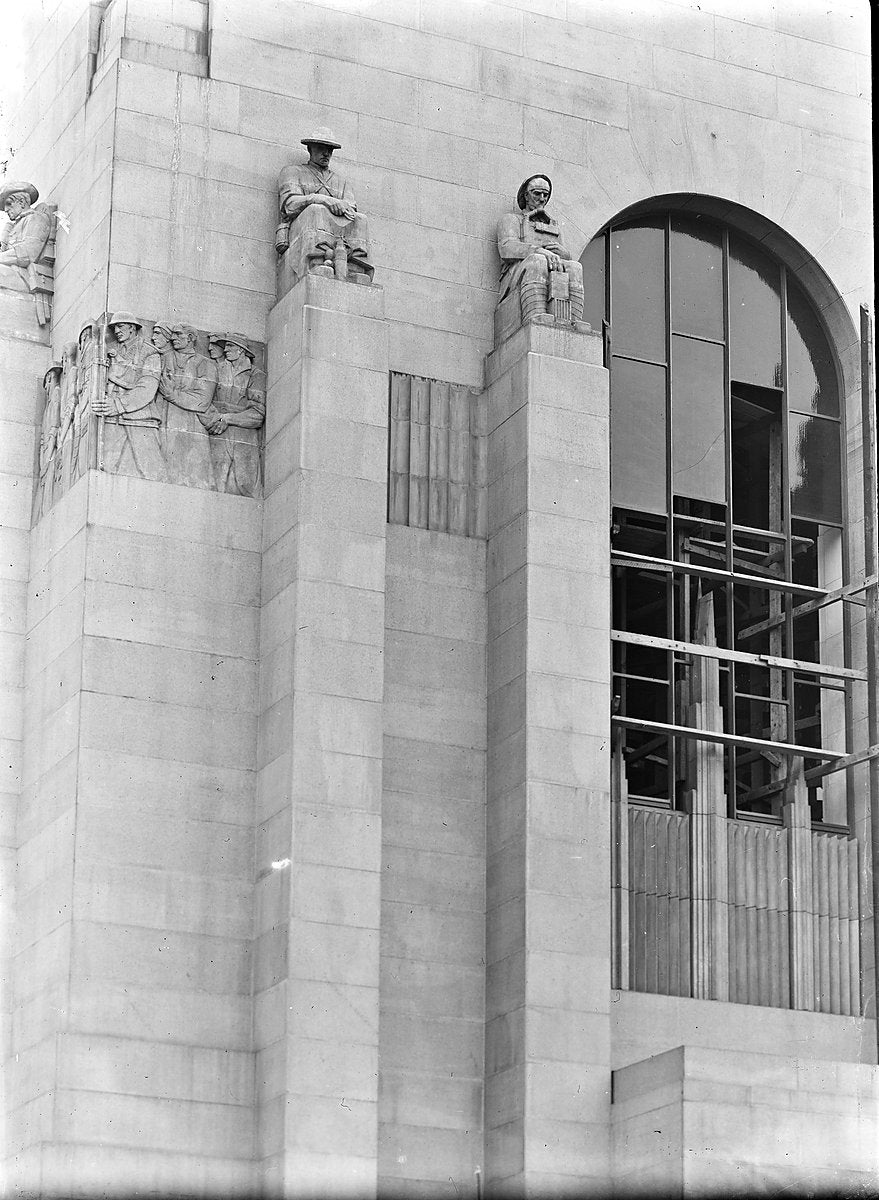
Seated sculptures and relief frieze, Anzac Memorial, Hyde Park — photograph, from Anzac Memorial, 1934
photograph·1934·Sydney CBD

Seated sculptures and relief frieze, Anzac Memorial, Hyde Park, 1934

Anzac Memorial, Hyde Park, Sydney / photograph by Harold CazneauxHarold Cazneaux
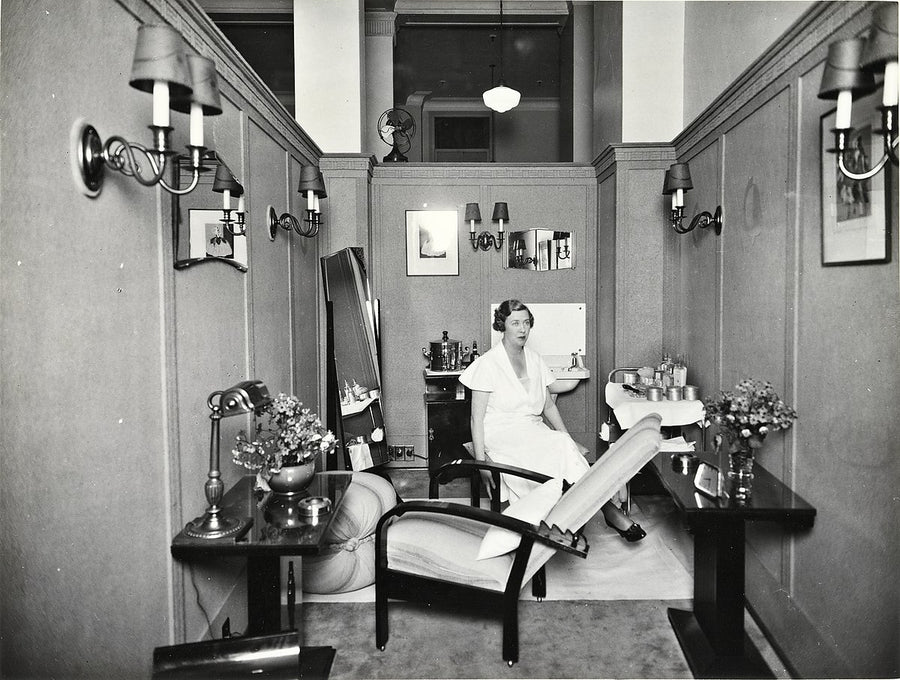
Seated woman in an Anthony Hordern & Sons interior, Sydney — photograph, from Sydney CBD, c. 1905–38
photograph·1905·Sydney CBD

Seated woman in an Anthony Hordern & Sons interior, Sydney, c. 1905–38

Anthony Hordern and Sons, Interiors of department store, offices, and Royal Easter Show displays, approximately 1905-1938Anthony Hordern & Sons
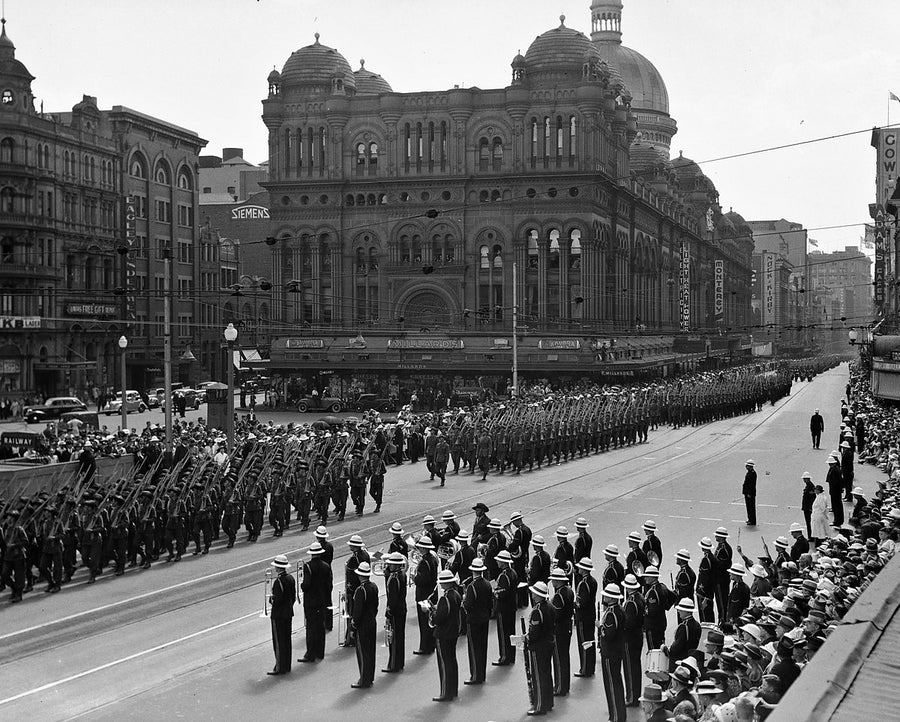
Second AIF troops marching past the Queen Victoria Building, George Street — photograph, from Sydney CBD, 1940
photograph·1937·Sydney CBD

Second AIF troops marching past the Queen Victoria Building, George Street, 1940

State Library NSWSam Hood
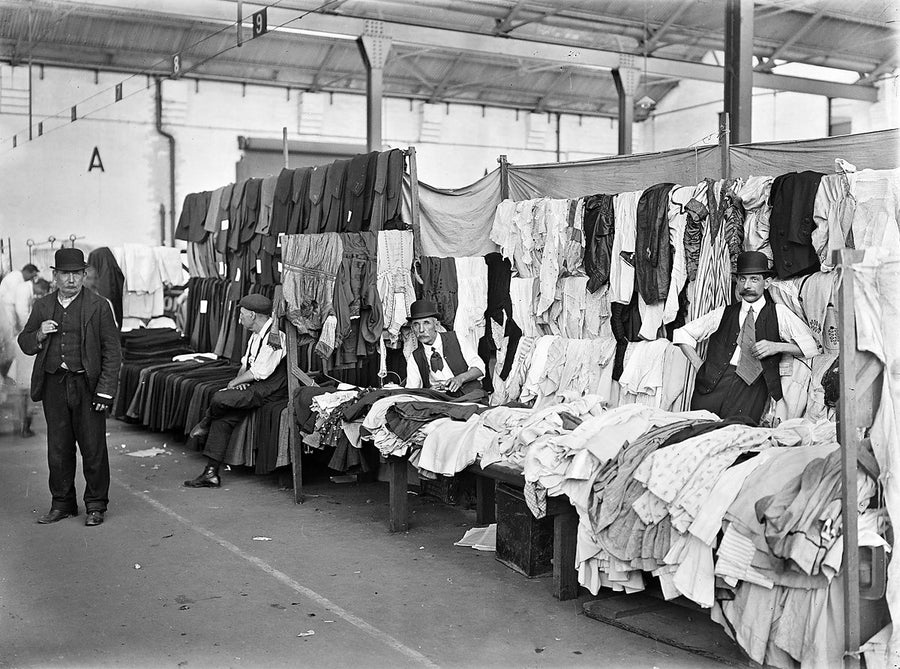
Second-hand clothing stalls at the City Markets, Haymarket — photograph, from Paddy's Markets, c. 1911–16
photograph·1913·Haymarket

Second-hand clothing stalls at the City Markets, Haymarket, c. 1911–16

Sydney marketsRex Hazlewood
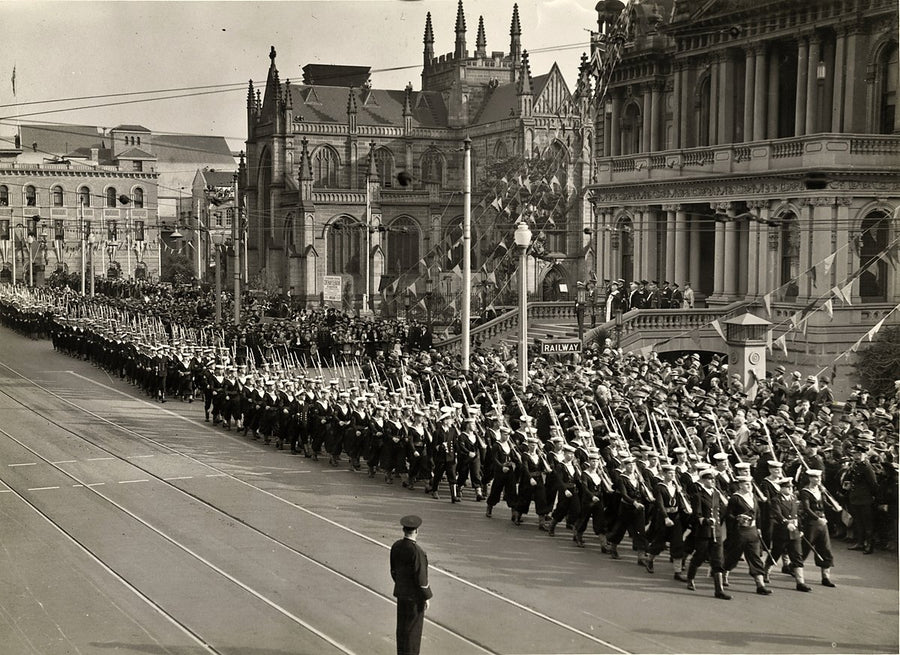
Servicemen marching past St Andrew's Cathedral and Sydney Town Hall, Sydney — photograph, from Sydney Town Hall, c. 1920–45
photograph·1938·Sydney CBD

Servicemen marching past St Andrew's Cathedral and Sydney Town Hall, Sydney, c. 1920–45

State Library NSWSam Hood
Shoppers outside Mark Foy's department store, Liverpool Street — photograph, from Mark Foys Building, c. 1927–29
photograph·1927·Sydney CBD

Shoppers outside Mark Foy's department store, Liverpool Street, c. 1927–29

Hood Collection part II, Box 042, nos. 052-072 : Trams, buses and traffic, Railway Square and Broadway; Express trains concourse, Central railway station; Shoppers on the steps, Mark Foy's; Christmas party, children's hospitalSam Hood
Singer sewing machine showroom in the Queen Victoria Building, George Street — photograph, from Queen Victoria Building, 1927
photograph·1924·Sydney CBD

Singer sewing machine showroom in the Queen Victoria Building, George Street, 1927

State Library NSWArthur Ernest Foster
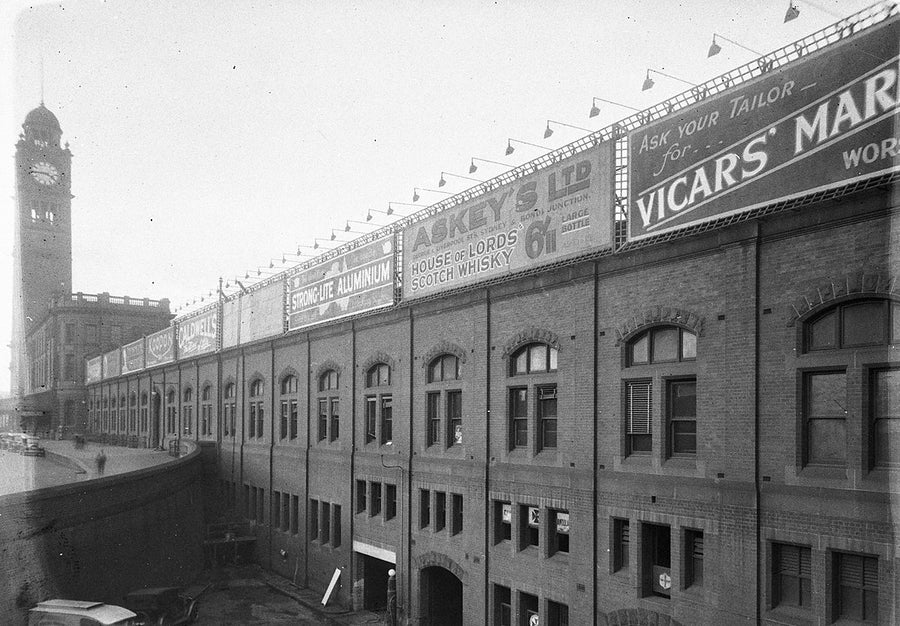
Sky-signs on Central Station Building: Askey's Scotch Whisky and Vicars' Marrickville — photograph, from Central Station, c. 1930s
photograph·1930·Haymarket

Sky-signs on Central Station Building: Askey's Scotch Whisky and Vicars' Marrickville, c. 1930s

Askey's House of Lords Scotch Whisky; Vicars' MarrickvilleSam Hood
Sky-signs on the western face of Central Railway Station, Sydney — photograph, from Central Station, c. 1930s
photograph·1930·Haymarket

Sky-signs on the western face of Central Railway Station, Sydney, c. 1930s

Strong-Lite Aluminium, Askeys Ltd and Vicars Marrickville TweedSam Hood
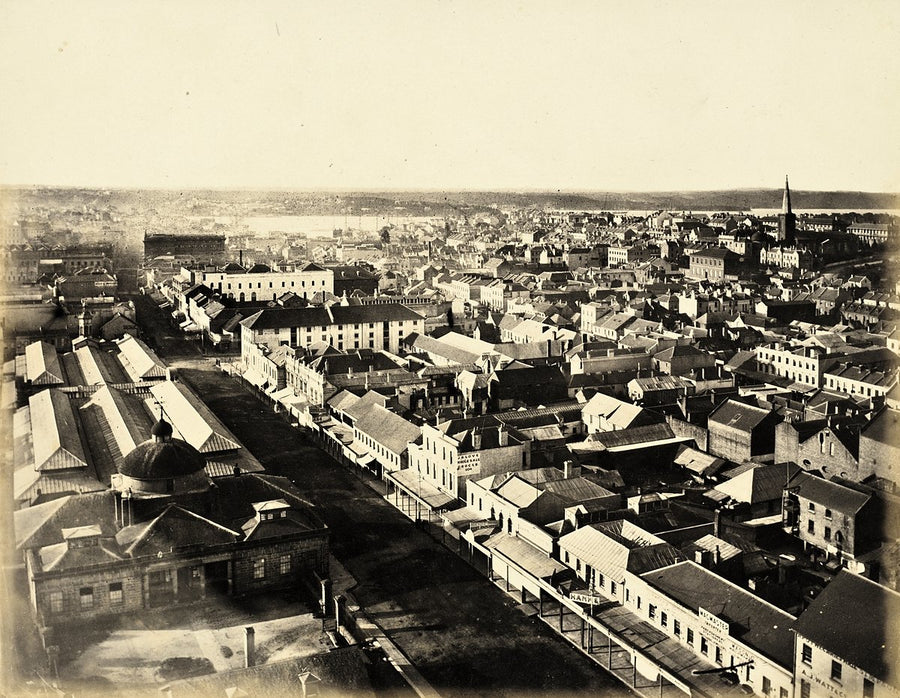
South from the tower of Central Railway Station, Sydney — photograph, from Central Station, 1920
photograph·1871·Haymarket

South from the tower of Central Railway Station, Sydney, 1920

Redfern Railway Station and Central Railway Station, Sydney
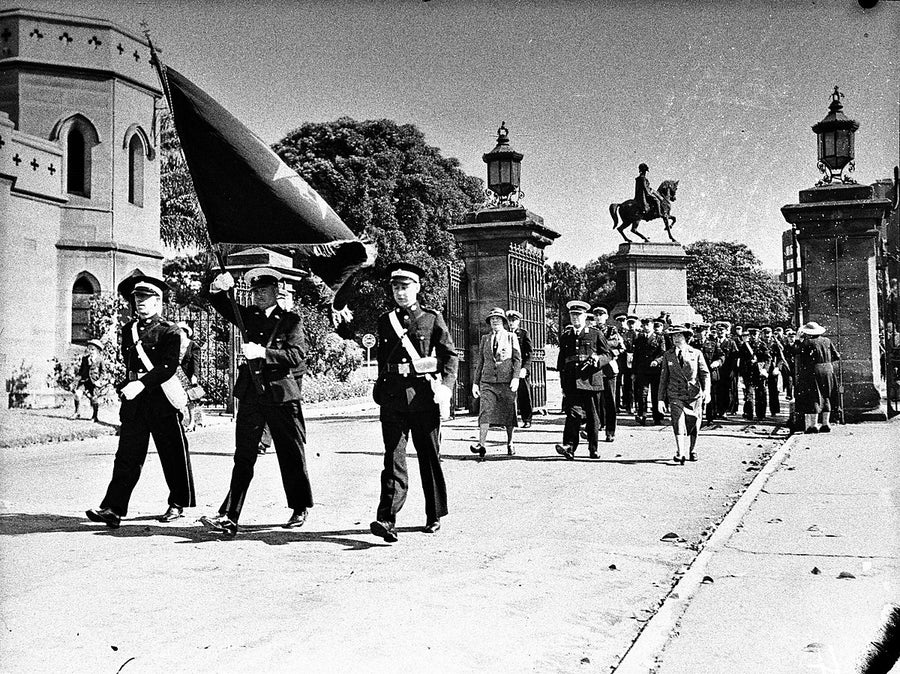
St John Ambulance Brigade marching through the Government House gates, Sydney — photograph, from Government House, 1940
photograph·1940·Sydney CBD

St John Ambulance Brigade marching through the Government House gates, Sydney, 1940

St John's Ambulance Brigade marching through the gatesSam Hood
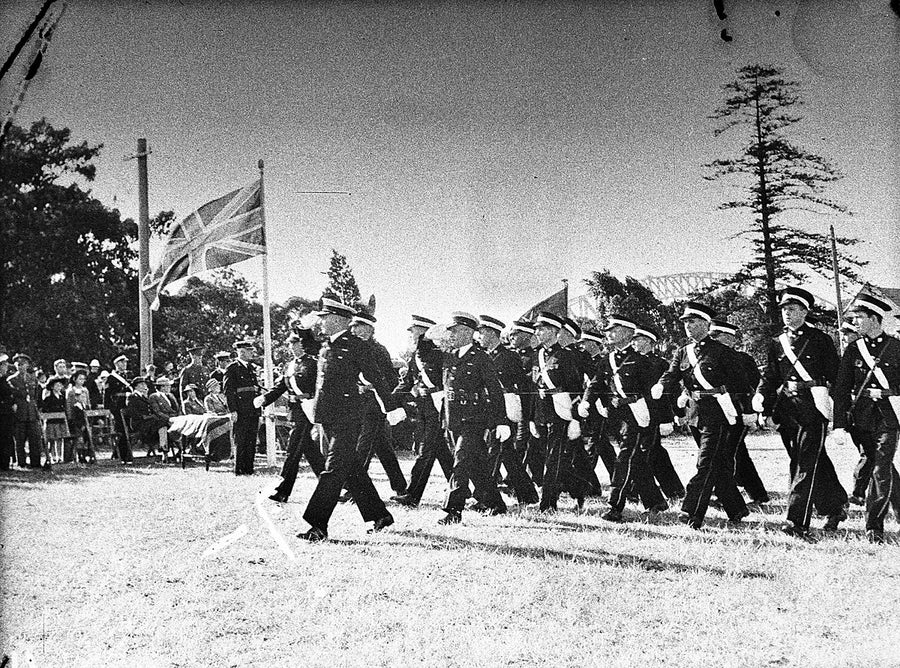
St John Ambulance Brigade on parade at Government House, Sydney — photograph, from Government House, 1940
photograph·1940·Sydney CBD

St John Ambulance Brigade on parade at Government House, Sydney, 1940

St John's Ambulance Brigade marchingSam Hood
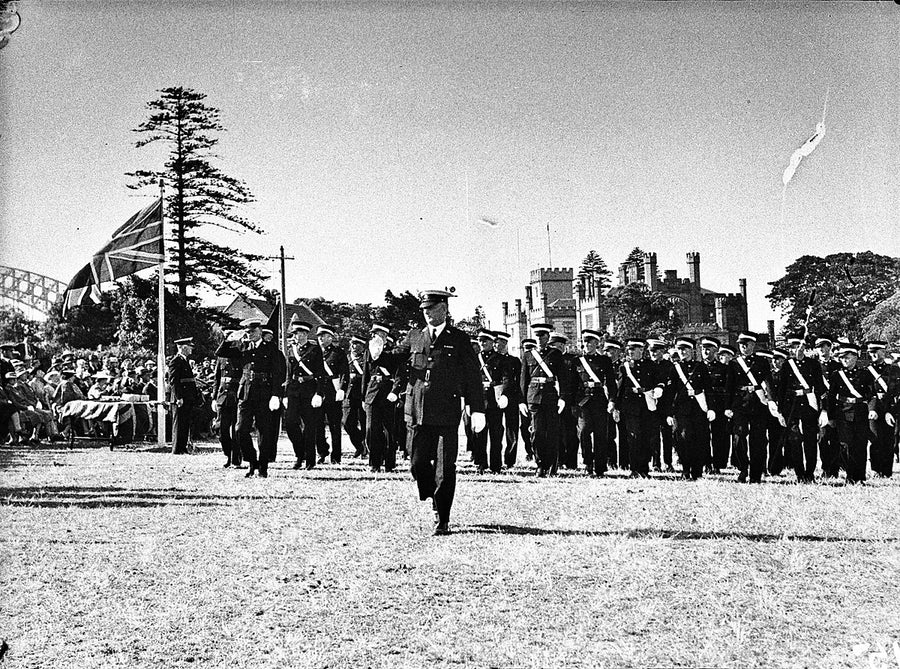
St John's Ambulance honours parade at Government House, Sydney — photograph, from Government House, 1940
photograph·1940·Sydney CBD

St John's Ambulance honours parade at Government House, Sydney, 1940

St John's Ambulance parade, conferring of honours and medals at Government House, SydneySam Hood
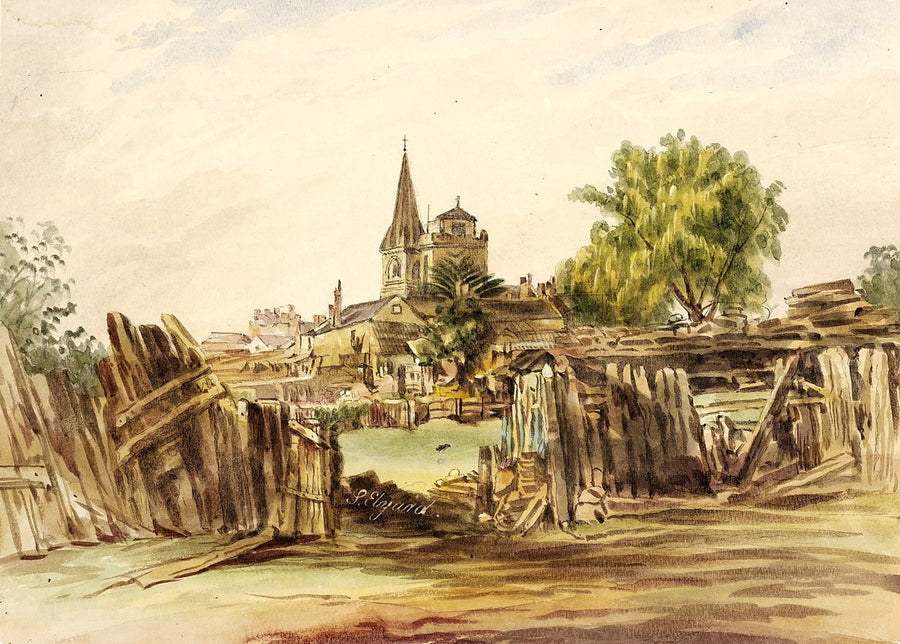
St Lawrence's Church, George Street South, Sydney — illustration, from Christ Church St Laurence, 1868
illustration·1862·Haymarket

St Lawrence's Church, George Street South, Sydney, 1868

Views of SydneySamuel Elyard
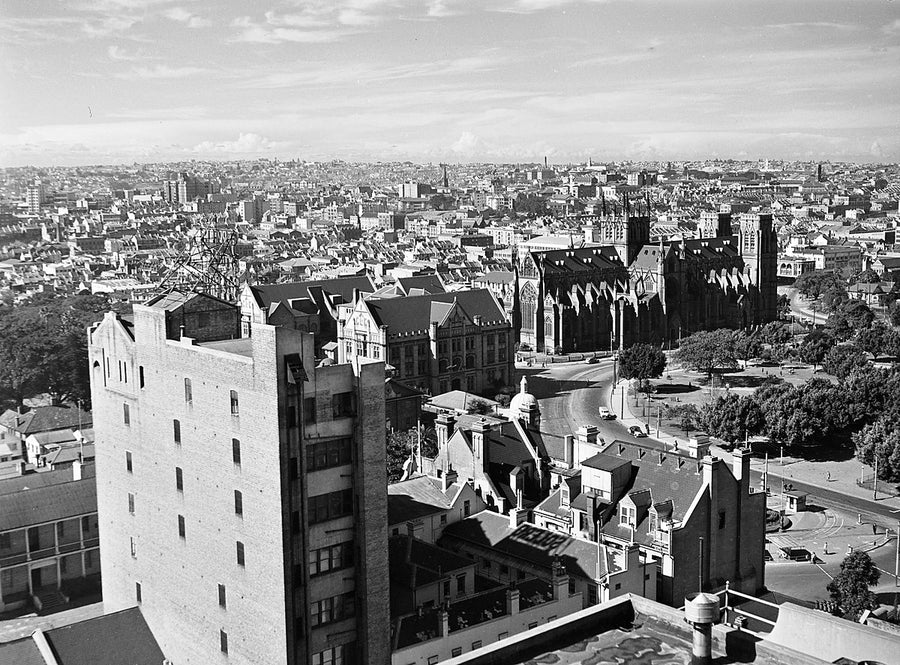
St Mary's Cathedral above Sydney rooftops — photograph, from St Mary's Cathedral, 1951
photograph·1951·Sydney CBD

St Mary's Cathedral above Sydney rooftops, 1951

Sydney streets, August 1951
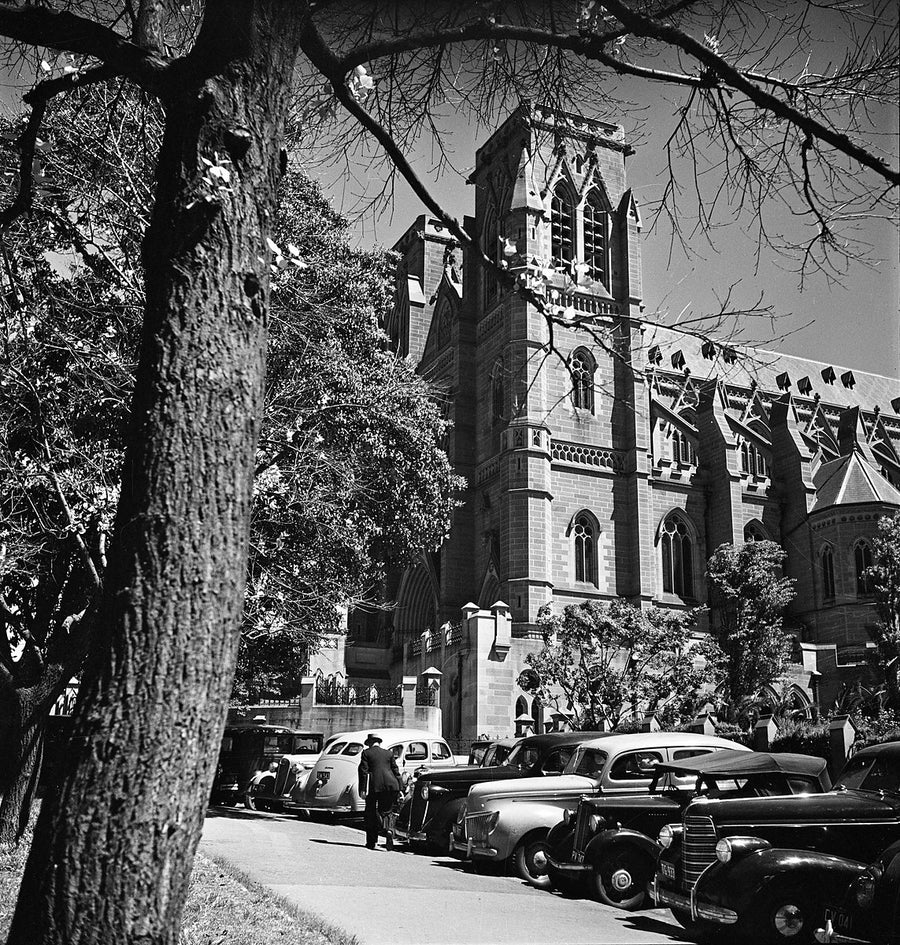
St Mary's Cathedral and parked cars, Sydney — photograph, from St Mary's Cathedral, c. 1940
photograph·1940·Sydney CBD

St Mary's Cathedral and parked cars, Sydney, c. 1940

St Mary’s Cathedral, ca. 1940 / photographed by Max DupainMax Dupain
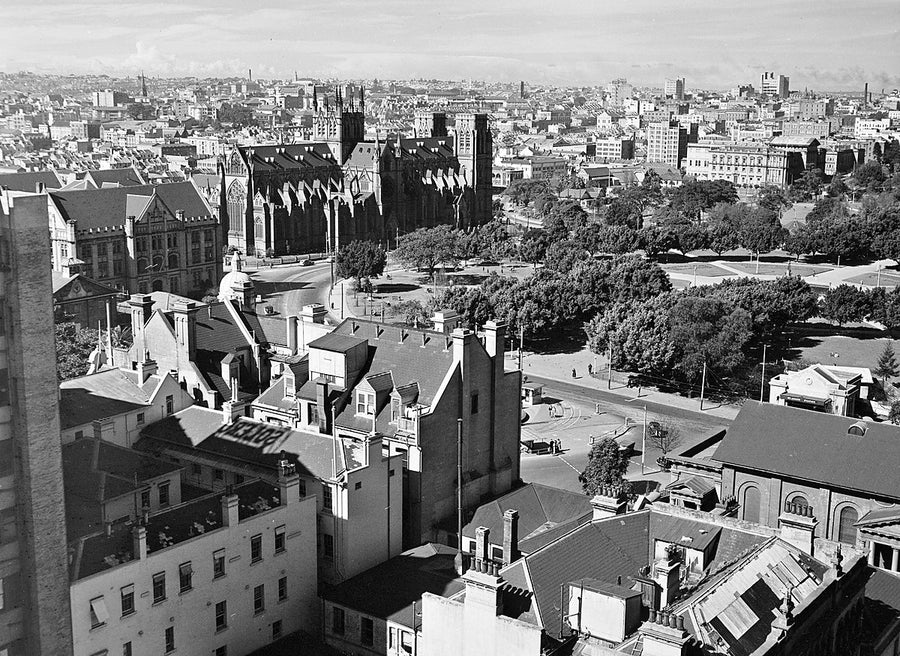
St Mary's Cathedral and Sydney rooftops — photograph, from St Mary's Cathedral, 1951
photograph·1951·Sydney CBD

St Mary's Cathedral and Sydney rooftops, 1951

Sydney streets, August 1951
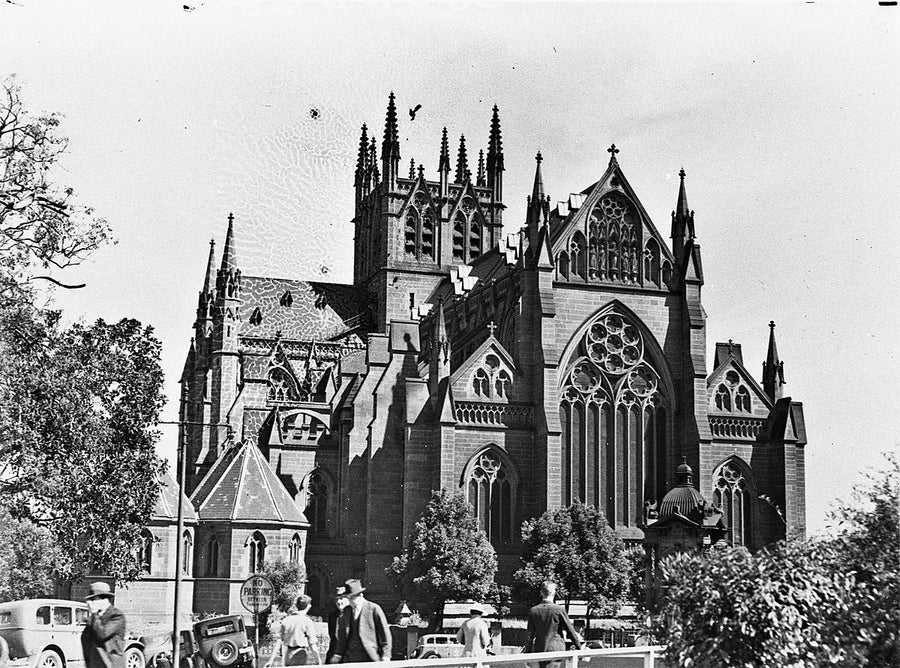
St Mary's Cathedral before its spires, Sydney — photograph, from St Mary's Cathedral, c. 1920–53
photograph·1937·Sydney CBD

St Mary's Cathedral before its spires, Sydney, c. 1920–53

Hood Collection part II, Box 077, nos. 099-146 : Church of England; City streets; Hubert Opperman, bicycle; Irene Purcell and Zane Grey; St Mary's Cathedral; William Street; Fun map of Sydney; Portraits; GroupsSam Hood
St Mary's Cathedral from Hyde Park, Sydney — photograph, from St Mary's Cathedral, 1850–1949
photograph·1933·Sydney CBD

St Mary's Cathedral from Hyde Park, Sydney, 1850–1949

State Library NSWSam Hood
St Mary's Cathedral from Hyde Park, Sydney — photograph, from St Mary's Cathedral, 1900–10
photograph·1900·Sydney CBD

St Mary's Cathedral from Hyde Park, Sydney, 1900–10

Sydney. Saint Mary's Cathedral, and Hyde Park. Horses & carts in streetStar Photo Co.
St Mary's Cathedral from Hyde Park, Sydney — photograph, from St Mary's Cathedral, c. 1940
photograph·1940·Sydney CBD

St Mary's Cathedral from Hyde Park, Sydney, c. 1940

St Mary’s Cathedral, ca. 1940 / photographed by Max DupainMax Dupain
St Mary's Cathedral without its spires, Sydney — photograph, from St Mary's Cathedral, c. 1920–53
photograph·1937·Sydney CBD

St Mary's Cathedral without its spires, Sydney, c. 1920–53

Hood Collection part II, Box 077, nos. 099-146 : Church of England; City streets; Hubert Opperman, bicycle; Irene Purcell and Zane Grey; St Mary's Cathedral; William Street; Fun map of Sydney; Portraits; GroupsSam Hood
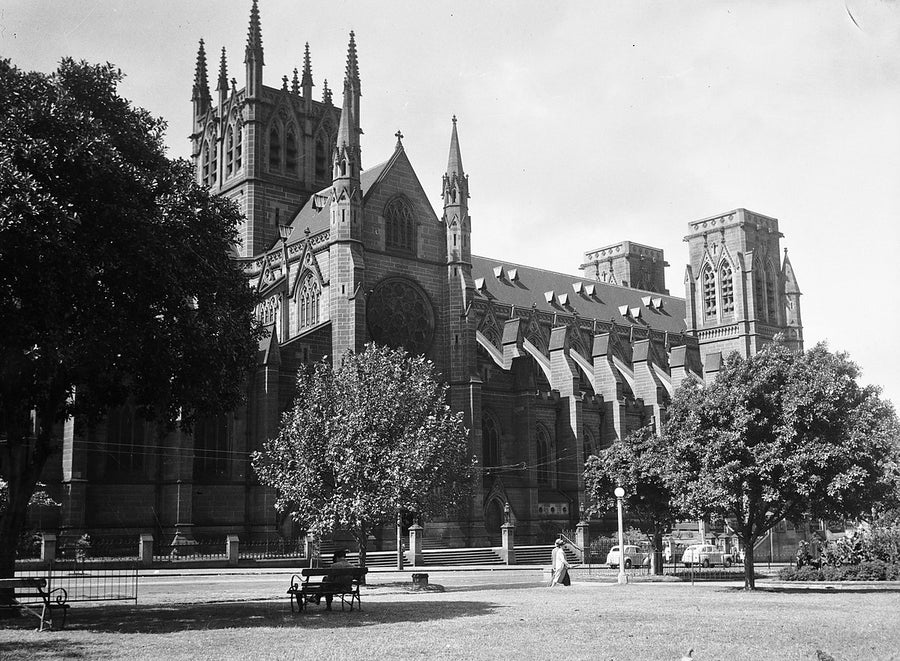
St Mary's Cathedral's northern face, Sydney — photograph, from St Mary's Cathedral, c. 1930s
photograph·1930·Sydney CBD

St Mary's Cathedral's northern face, Sydney, c. 1930s

The northern face of St Mary's CathedralSam Hood
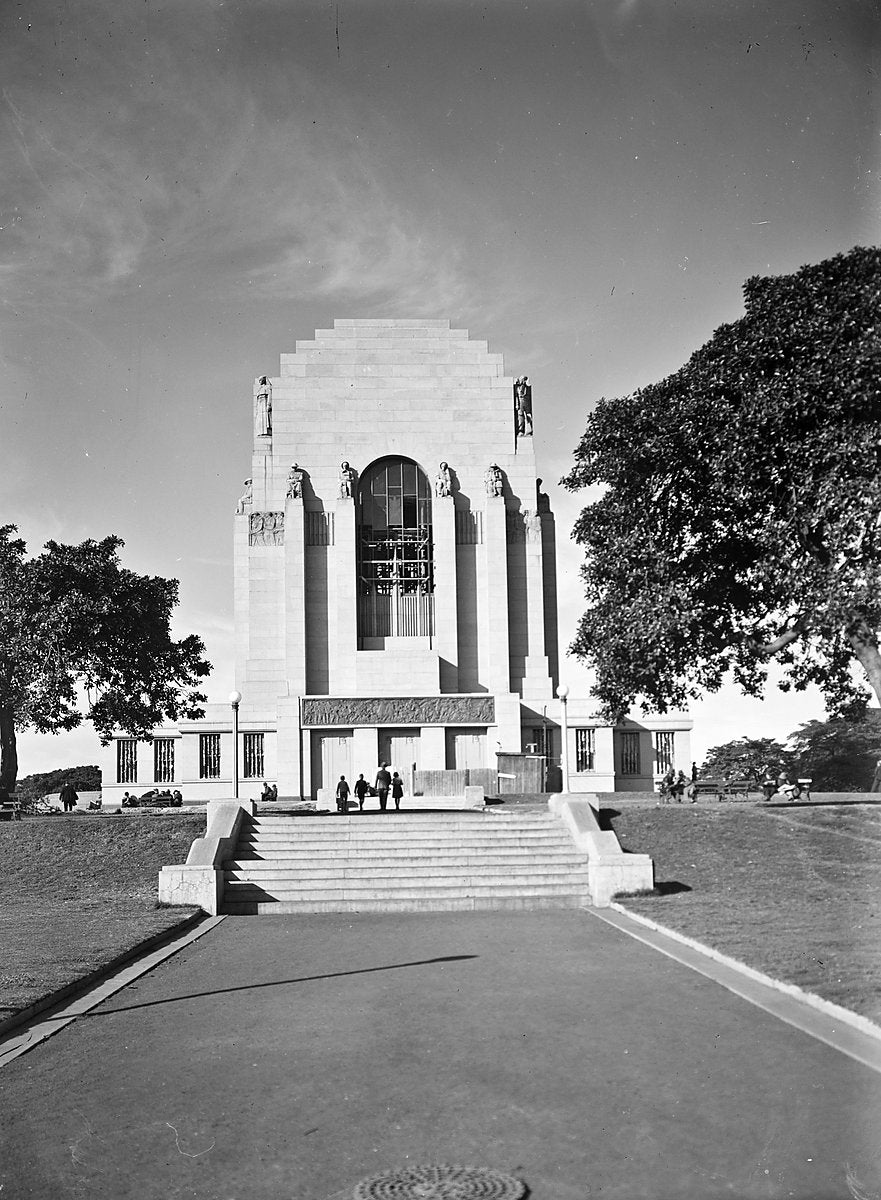
Steps up to the Anzac Memorial, Hyde Park — photograph, from Anzac Memorial, 1934
photograph·1934·Sydney CBD

Steps up to the Anzac Memorial, Hyde Park, 1934

Anzac Memorial, Hyde Park, Sydney / photograph by Harold CazneauxHarold Cazneaux
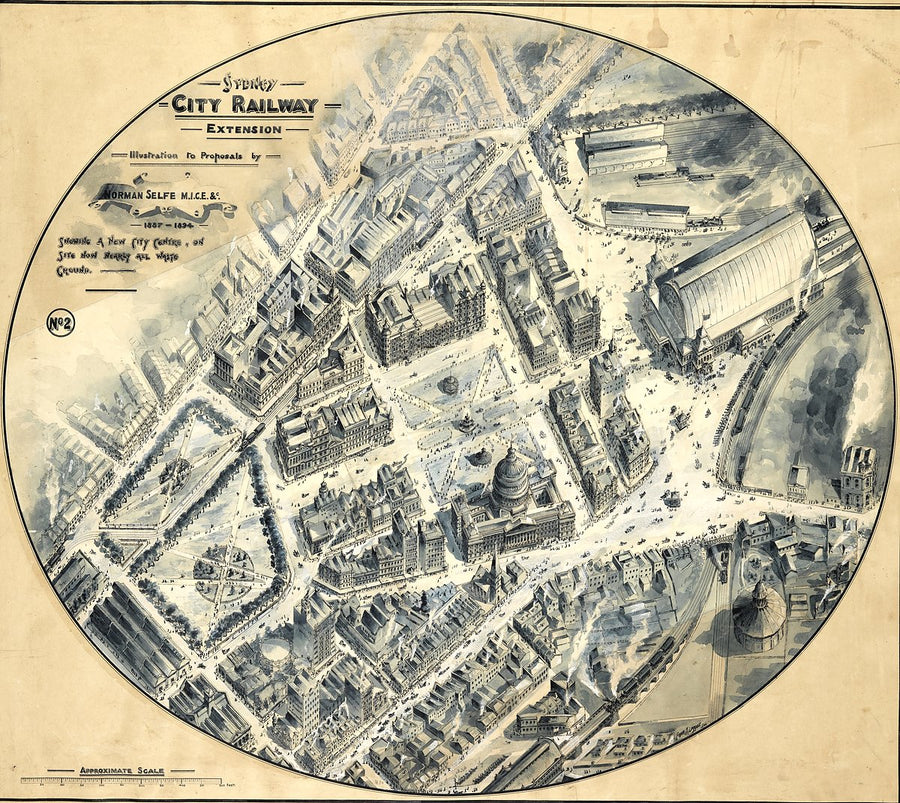
Sydney City Railway Extension, Norman Selfe's proposed new city centre — illustration, from Haymarket, 1890s
illustration·1890·Haymarket

Sydney City Railway Extension, Norman Selfe's proposed new city centre, 1890s

Royal Australian Historical Society : proposed plans of area near Central Station, SydneyCharles Bayliss; Norman Selfe
Sydney Grammar School chemistry class — photograph, from Sydney Grammar School, 1954
photograph·1954·Darlinghurst

Sydney Grammar School chemistry class, 1954

Sydney Grammar, June 1954
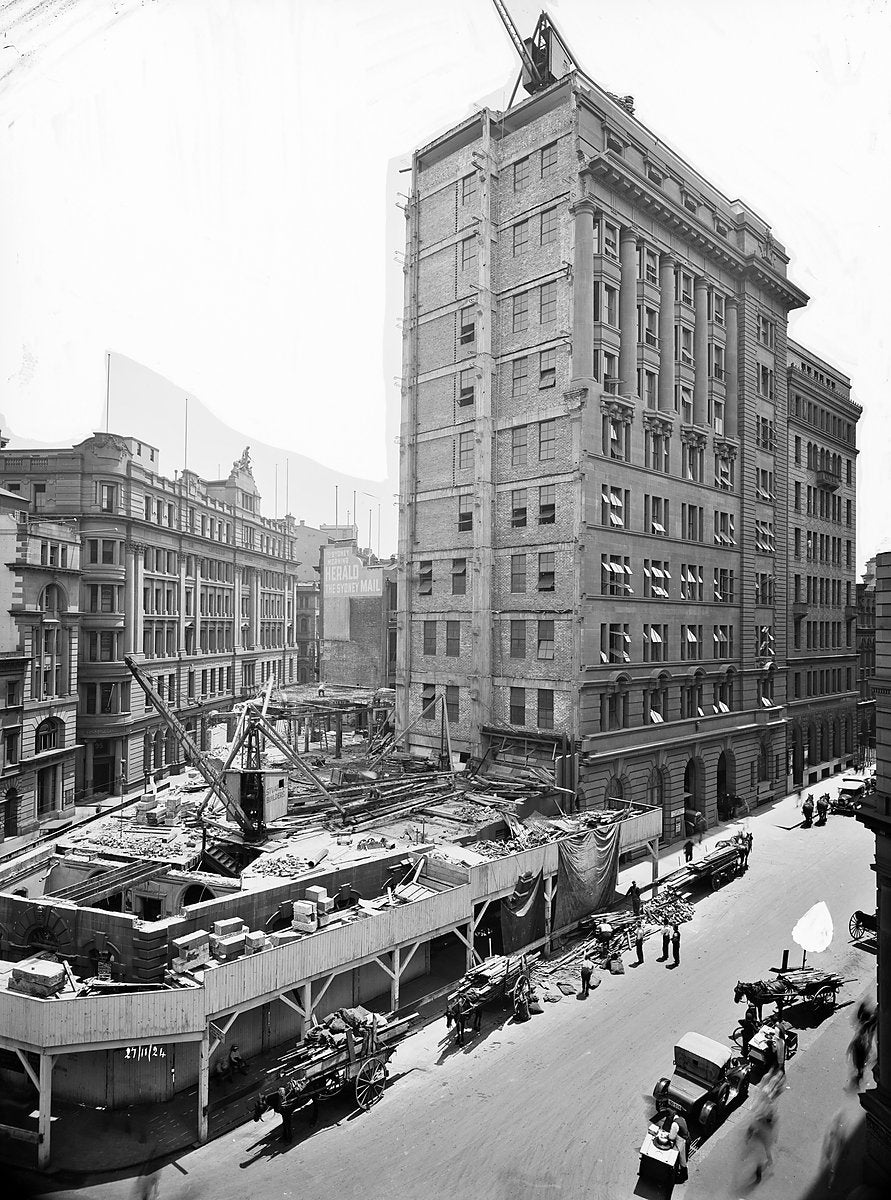
Sydney Morning Herald offices under construction, Pitt and O'Connell Streets — photograph, from Pitt Street, c. 1924–27
photograph·1924·Sydney CBD

Sydney Morning Herald offices under construction, Pitt and O'Connell Streets, c. 1924–27

State Library NSWArthur Ernest Foster
Sydney rooftops from the Town Hall clocktower — photograph, from Sydney Town Hall, 1873
photograph·1873·Sydney CBD

Sydney rooftops from the Town Hall clocktower, 1873

Panorama of Sydney taken from Sydney Town HallFrancis W. Robinson
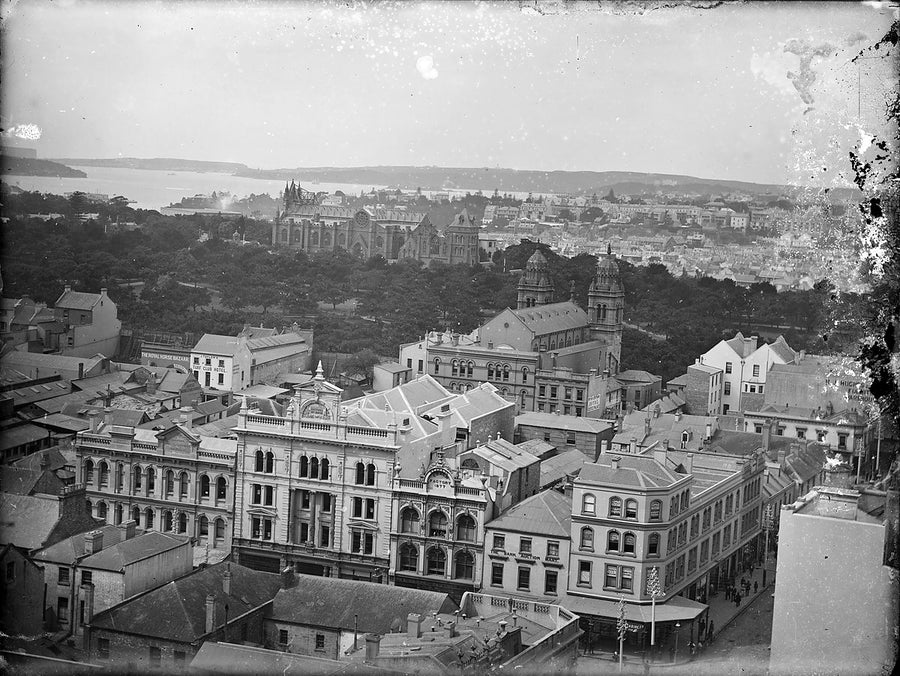
Sydney rooftops looking to St Mary's Cathedral — photograph, from St Mary's Cathedral, 1890–1910
photograph·1890·Sydney CBD

Sydney rooftops looking to St Mary's Cathedral, 1890–1910

Glass negatives including views of Wynyard Park, Circular Quay, and Pitt Street, SydneyWilliam Joseph Macpherson
Sydney rooftops with Bank of New South Wales signage — photograph, from Sydney CBD, 1951
photograph·1951

Sydney rooftops with Bank of New South Wales signage, 1951

Sydney streets, August 1951
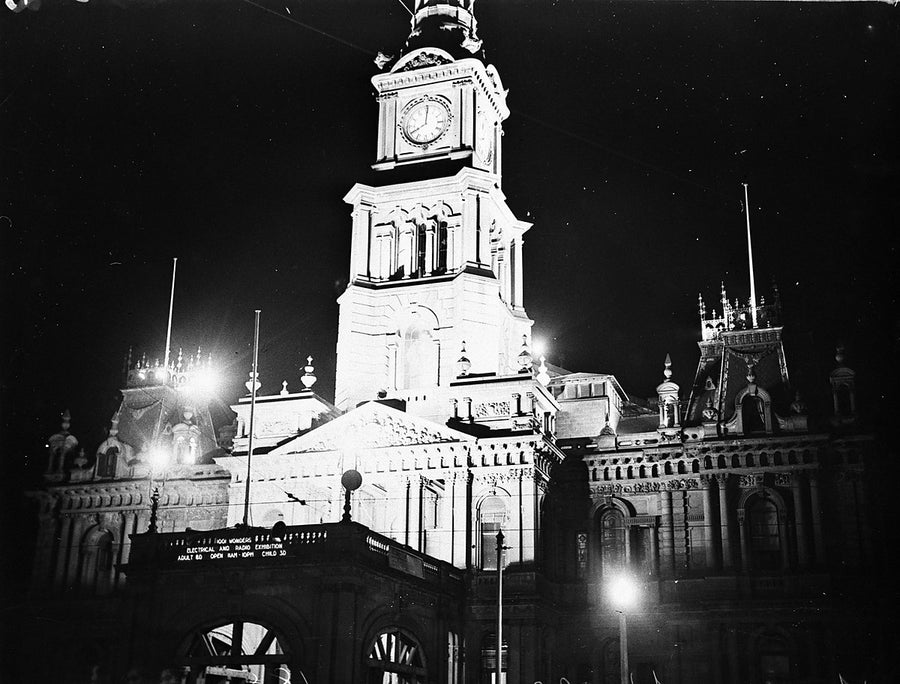
Sydney Town Hall lit for the Electrical and Radio Exhibition — photograph, from Sydney Town Hall, 1930
photograph·1930s·Sydney CBD

Sydney Town Hall lit for the Electrical and Radio Exhibition, 1930

The Sydney Town Hall illuminated for the Electrical & Radio ExhibitionSam Hood
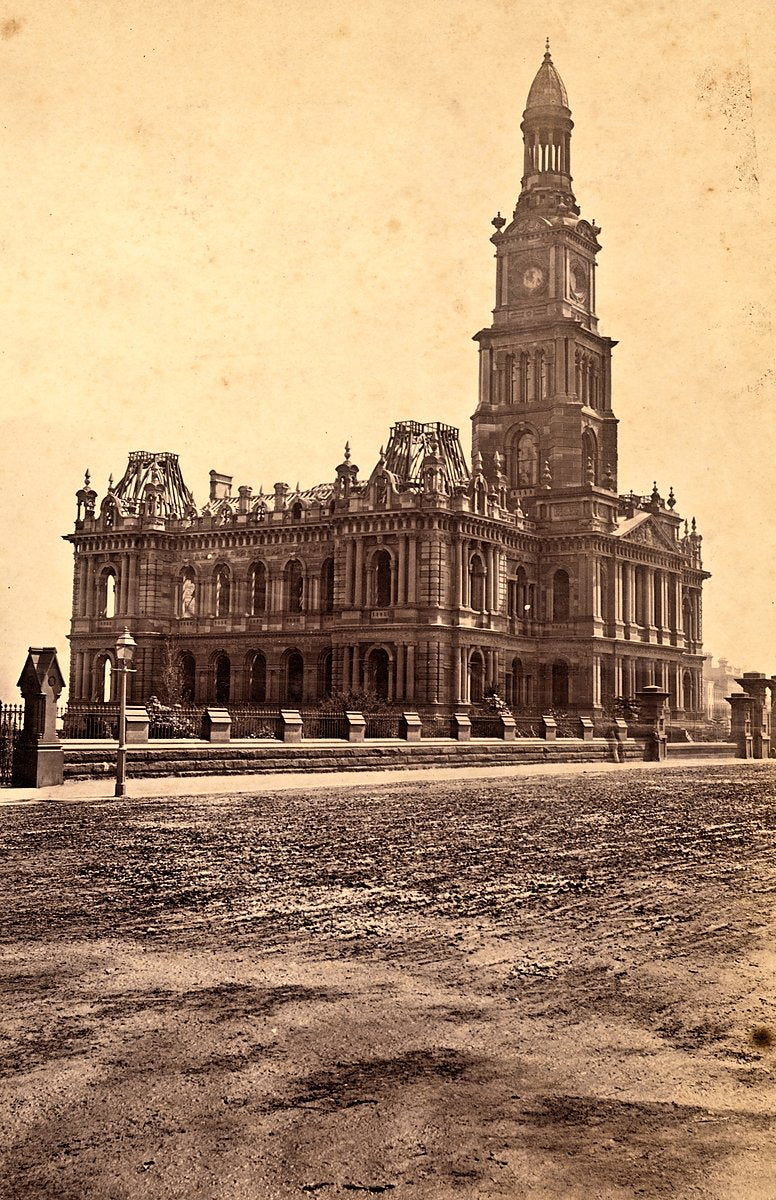
Sydney Town Hall under construction, clock tower complete — photograph, from Sydney Town Hall, c. 1875
photograph·1875·Sydney CBD

Sydney Town Hall under construction, clock tower complete, c. 1875

Sydney Town Hall under construction
Sydney Town Hall with completed clock tower, before Centennial Hall — photograph, from Sydney Town Hall, c. 1875–83
photograph·1875·Sydney CBD

Sydney Town Hall with completed clock tower, before Centennial Hall, c. 1875–83

Town Hall [Sydney
Sydney Town Hall with completed clock tower — photograph, from Sydney Town Hall, c. 1875–83
photograph·1875·Sydney CBD

Sydney Town Hall with completed clock tower, c. 1875–83

Town Hall [Sydney
Sydney Town Hall with its completed clock tower — photograph, from Sydney Town Hall, c. 1875–83
photograph·1875·Sydney CBD

Sydney Town Hall with its completed clock tower, c. 1875–83

Sydney Town Hall
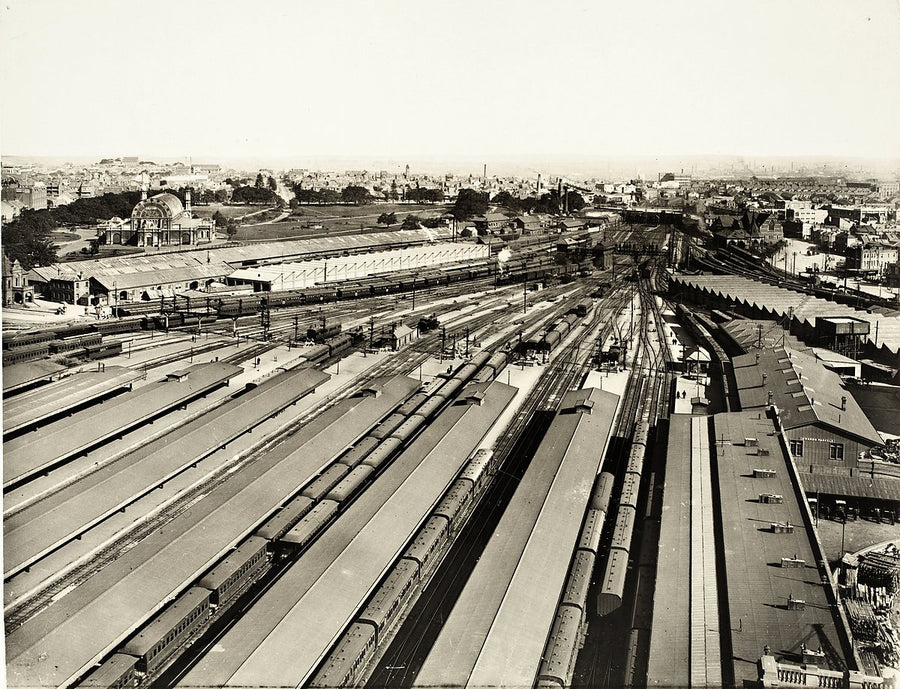
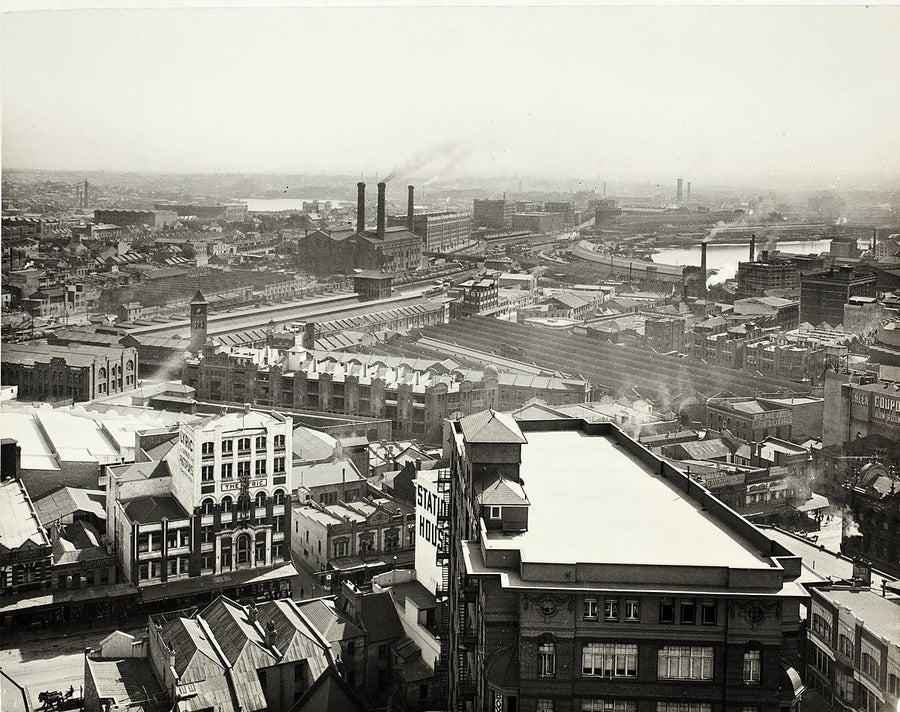
Sydney's Central Station railway yards, looking toward Darling Harbour — photograph, from Central Station, 1906–20
photograph·1871·Haymarket

Sydney's Central Station railway yards, looking toward Darling Harbour, 1906–20

Redfern Railway Station and Central Railway Station, Sydney
Sydney's first railway terminus at Redfern — photograph, from Central Station, 1871
photograph·1871·Haymarket

Sydney's first railway terminus at Redfern, 1871

Redfern Railway Station and Central Railway Station, Sydney
Traffic and railway tracks near Central station, Sydney — photograph, from Haymarket, 1949
photograph·1949·Haymarket

Traffic and railway tracks near Central station, Sydney, 1949

Sydney
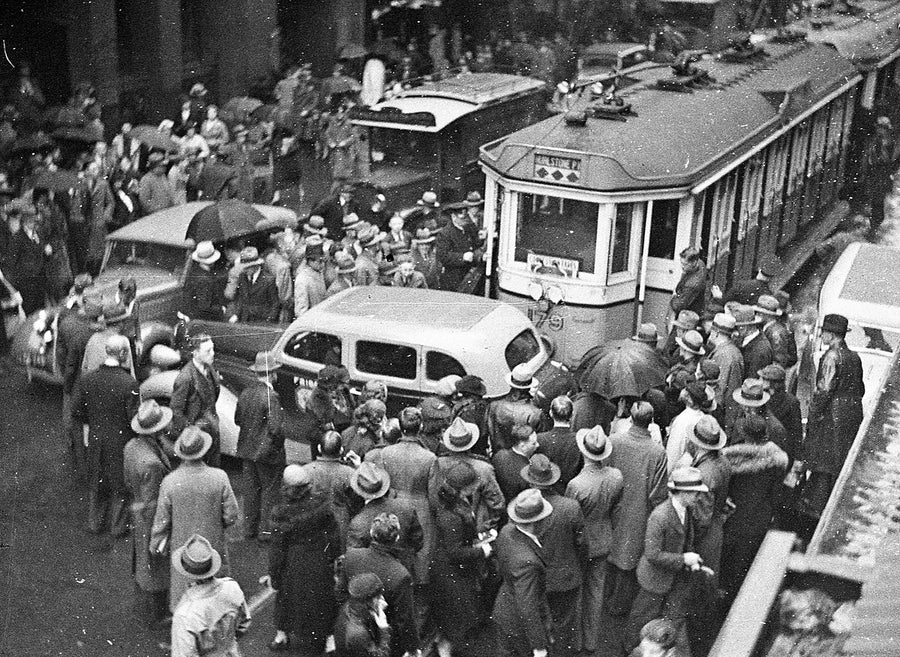
Tram and taxi smash in Pitt Street — photograph, from Pitt Street, 1937
photograph·1937·Sydney CBD

Tram and taxi smash in Pitt Street, 1937

Tram and taxi smash in Pitt StreetSam Hood
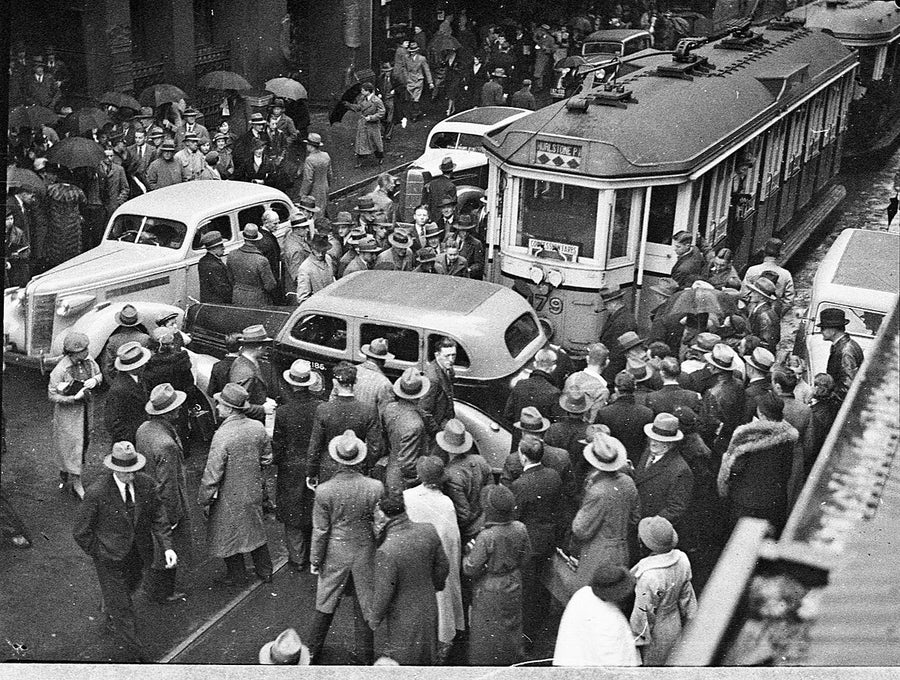
Tram and taxi smash in Pitt Street — photograph, from Pitt Street, 1937
photograph·1937·Sydney CBD

Tram and taxi smash in Pitt Street, 1937

Tram and taxi smash in Pitt StreetSam Hood
University of Sydney float, Commonwealth Jubilee procession, Sydney — photograph, from Sydney Town Hall, 1951
photograph·1942·Sydney CBD

University of Sydney float, Commonwealth Jubilee procession, Sydney, 1951

Hood Collection part II, Box 078, nos. 001-069 : Hardy-Watkins wedding; AWA paintings exhibit; Commonwealth Golden Jubilee procession; Clarence Miller wedding; Warwick Peet wedding; Rural valley; Portraits; Dog; Swampy landSam Hood
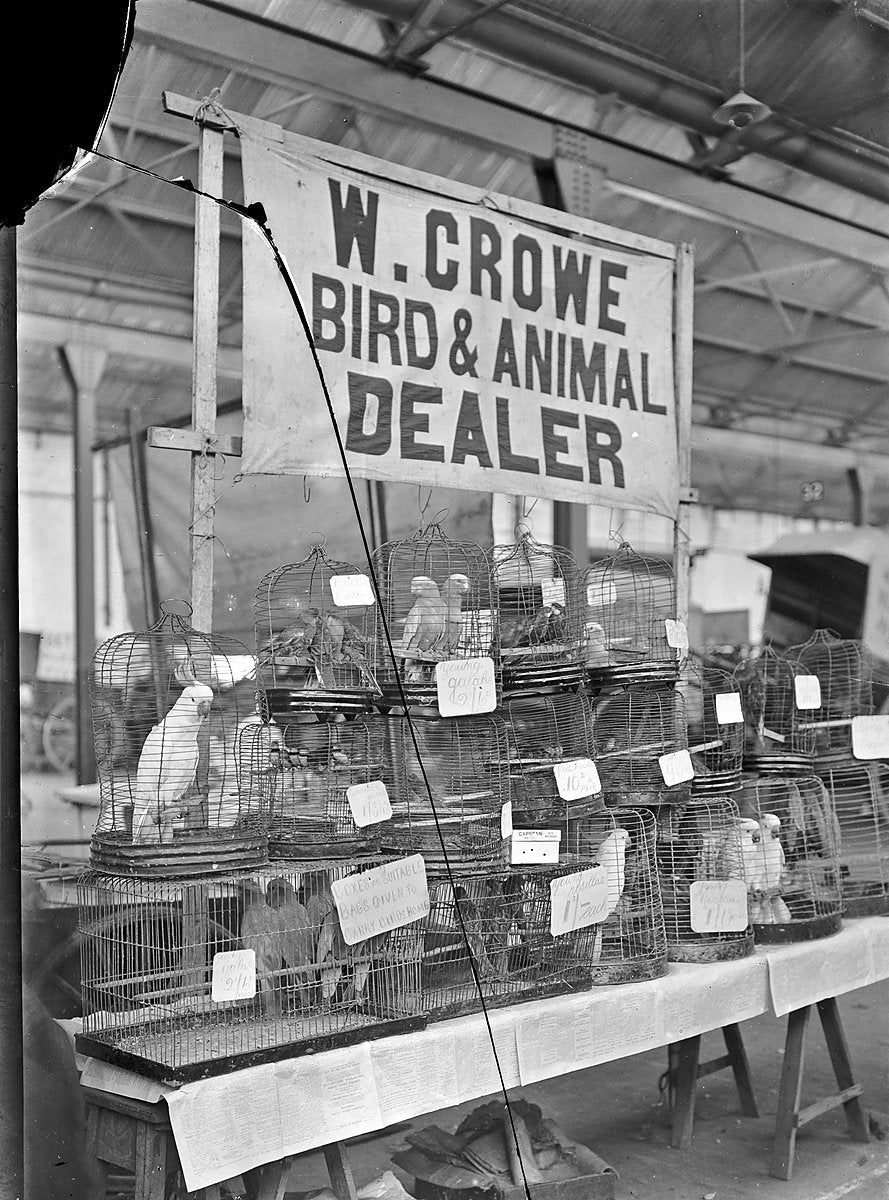
W. Crowe bird and animal dealer's stall, City Markets, Haymarket — photograph, from Paddy's Markets, c. 1911–16
photograph·1913·Haymarket

W. Crowe bird and animal dealer's stall, City Markets, Haymarket, c. 1911–16

Sydney marketsRex Hazlewood
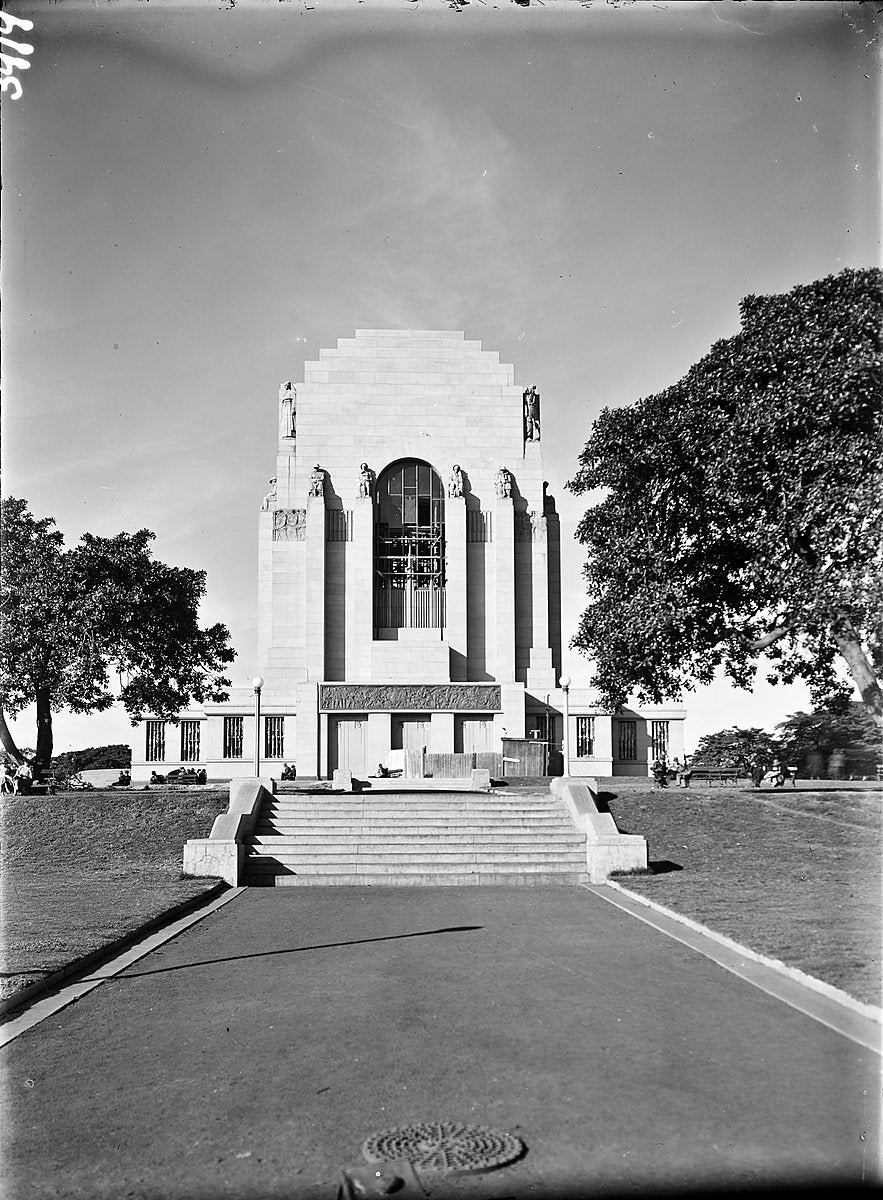
West front of the Anzac Memorial, Hyde Park, Sydney — photograph, from Anzac Memorial, 1934
photograph·1934·Sydney CBD

West front of the Anzac Memorial, Hyde Park, Sydney, 1934

Anzac Memorial, Hyde Park, Sydney / photograph by Harold CazneauxHarold Cazneaux